AV editing using FFmpeg, sox, Blender, Audacity
Brief introduction to digital media
Digital Audio/Video
Compared to the conventional tapes, they are convenient to store, share and highly cost effective. The A/V data is stored in files with certain extensions. Example, mov, mp3, mpg, mp4, mkv etc.
Media compressions
The raw media files are often considered good for video editing as they retain unaltered data from camera/microphone. However, the raw size could be in order of hundreds of GB for just an hour of 1080i video. This isn’t suitable for transmission and storage. Hence, a compression on original data is applied according to the production house requirements. Most studio however prefer lossless compression.
Containers or Formats or Extensions
The formats are often the extensions of the file, technically may be called as containers. We will use the term container henceforth. A container is a software wrapper which carries encoded A/V and its metadata.
Codecs
(Coder-Decoder) The compression of the data is crucial. There are several algorithms implemented to optimize the encoding and decoding process. However, there are known tradeoffs, such as, a highly compressed file may require higher CPU while decoding, and so on. The selection of codecs is a thoughtful process based on factors such as end user, bandwidth, quality, cost etc.
Few popular codecs are h264, vp8, lame, DivX etc. Find more at this wiki page.

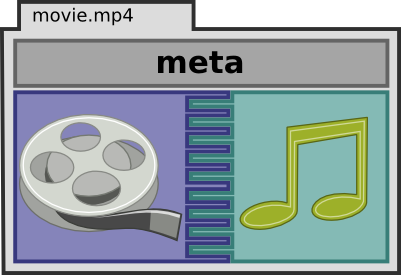
MP4 container holding audio, video, and metadata image source
FFmpeg
A simple yet powerful cross platform, cross architecture, command line tool to record, convert and stream audio and video data. There are several projects which use FFmpeg in backend, an extensive list can be found here.

FFmpeg block diagram
FFmpeg quick help
Size reduction by either reducing the video resolution or by lowering bit rate
To check the bit rate, codec, frame rate info
ffmpeg -i sample-video.mp4
Size reduction by restricting bandwidth
ffmpeg -i sample-video.mp4 -vb 500k -c:a copy reduced_vb.mp4
Size reduction by scaling down
ffmpeg -i sample-video.mp4 -c:a copy -vf scale=640:360 reduced_scale.mp4
Joining media files
It is easier to concatenate less compressed files, H.264 and modern codecs are highly compact and complicated, however, it is possible to concantinate them using advance options in FFmpeg. We will use the more widely used approach where we will convert complex codecs to a simpler one’s.
Let us convert sample-video.mp4 to sample-video.mpg
ffmpeg -i sample-video.mp4 -q:v 2 sample-video.mpg
Please note, we haven’t mentioned target codec, ffmpeg choose the best codec for the mpg container. Once converted we can verify
ffmpeg -i sample-video.mpg
By the way, the -q:v 2 factor is chosen for best results. It can also be done with -vb flag. Also, note the size and bandwidth for the mpg file due to its poor compression.
Let us join videos
ffmpeg -i "concat:sample-video.mpg|sample-video.mpg" -c copy output.mpg
More on concatenation at https://trac.ffmpeg.org/wiki/Concatenate
Muxing/Demuxing (splitting and joining)
Often we need to extract audio/video from a given media file, which is technically the demuxing process, and ofcourse, the reverse of it is muxing.
Let us demux our mpg file. The -an flag disable audio in output. Let us obtain only video component
ffmpeg -i sample-video.mpg -c:v copy -an video.mpg
To extract audio only
ffmpeg -i sample-video.mpg -c:a copy -vn audio.mpg
Now we can check the properties of both extracted files.
Let us join them back or mux them into mpg:
ffmpeg -i video.mpg -i audio.mpg -c copy output.mpg
Video stabilization
We often shoot handheld videos with smartphones, despite of several on camera stabilizations, we may not get the desired results. The videostab filter of FFmpeg does the job neatly.
A stabilization act is a 2 step process.
- Detecting the shakes
- Applying algorithms to minimize
Let us first detect shakiness
ffmpeg -i shaky-video.mkv -vf vidstabdetect=show=1 dummy.mkv
The dummy.mkv shows the points where the filter has found uneven movements. The above process also creates a text file with coordinates and filter parameters.
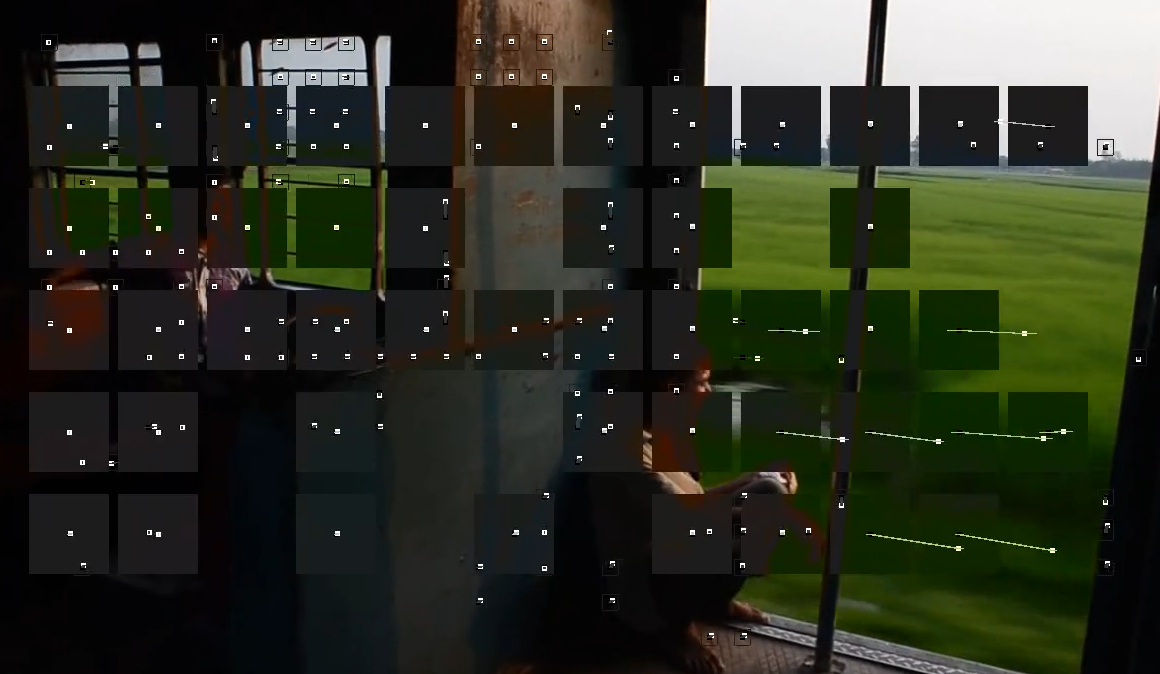
The filter will detect the motion in several points on video and tracks them accordingly.
To remove the shakes, let us apply the filter
ffmpeg -y -i shaky-video.mkv -vf vidstabtransform -c:a copy stabilized.mkv
Explore more at https://github.com/georgmartius/vid.stab
Cutting a portion of video with audio
It is a simple straight forward step with FFmpeg:
ffmpeg -ss 00:00:00.00 -i sample-video.mkv -t 00:00:05.00 -acodec copy -vcodec copy 5sec-cut.mkv
Mute a portion of audio only
It is again a straight forward step
ffmpeg -i sample-video.mp4 -af "volume=enable='between(t,1,3)':volume=0 mute-1-3s.mp4
SOX and FFmpeg
Audio noise reduction using sox
Similar to video stabilization, noise reduction is also a 2 step process.
- Detecting noise
- Applying filter to minimize
Let us first extract audio from video
ffmpeg -i noisy-video.ogv -vn noisy-audio.ogg
Now, let us obtain the noise profile
sox noisy-audio.ogg -n trim 0 1 noiseprof myprofile
This will analyze audio from 0 to 1 second and create a noise profile.
To reduce noise to entire audio, we need to apply sox again with our detected noise profile.
sox noisy-audio.ogg noisefree.ogg noisered myprofile 0.2
The 0.2 value is for moderate noise reduction in a scale of 0 to 1.
Now, we can mux the audio-video files
ffmpeg -i noisefree.ogg -i noisy-video.ogv noisefree.ogv
Audacity
Audacity is a free, easy-to-use, cross platform, cross architecture, multi-track audio editor.
The UI is simple and easy to navigate.
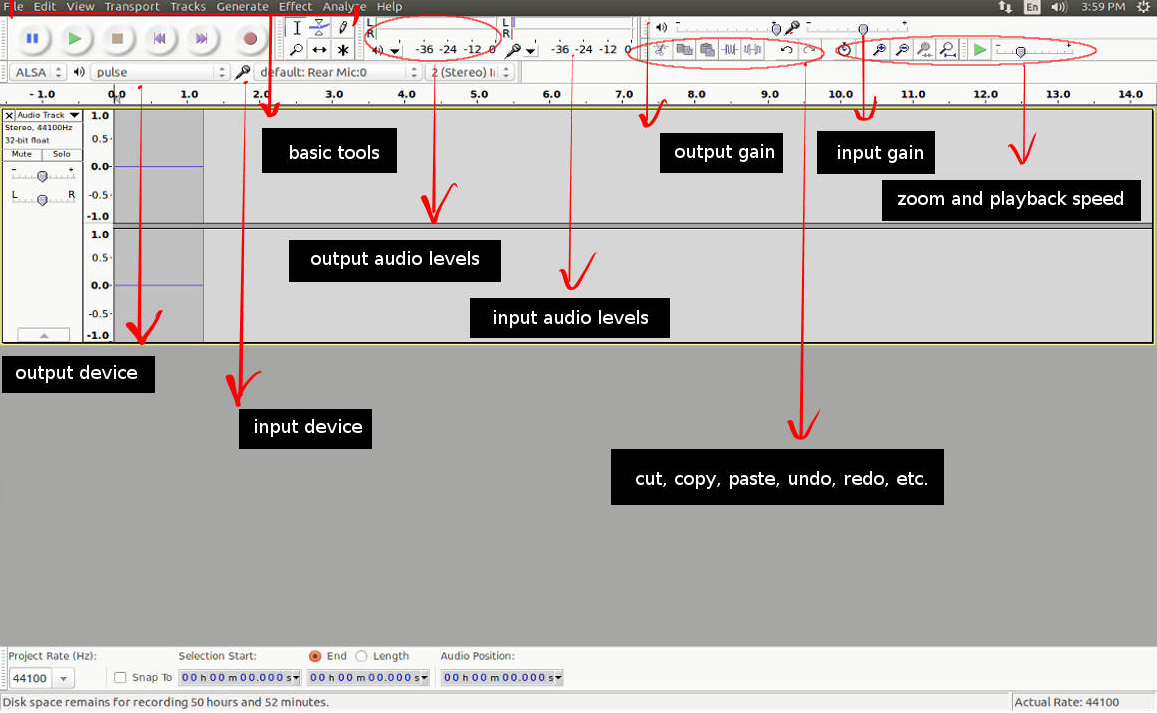
Audacity UI source image
Noise reduction using Audacity
Noise reduction is fairly simple due to visual navigation. However, it is still a 2 step process.
- Getting the noise profile
- Noise reduction
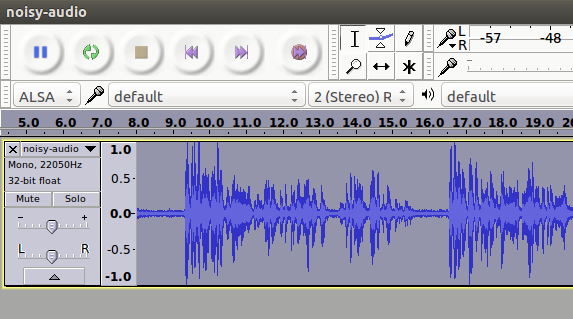
Let us begin with getting the noise profile. Import the audio to timeline, select a portion of noise.
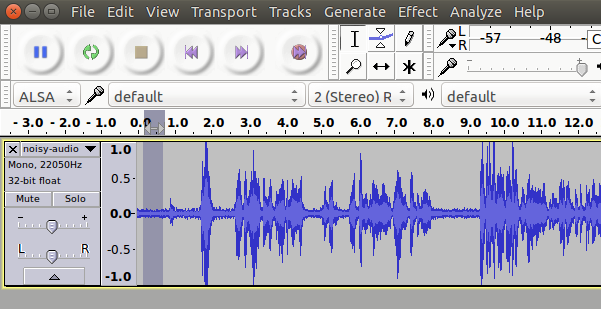
Select small portion of noise for creating noise profile
Now, go to Menu -> Effect -> Noise Reduction and select get Get Noise Profile
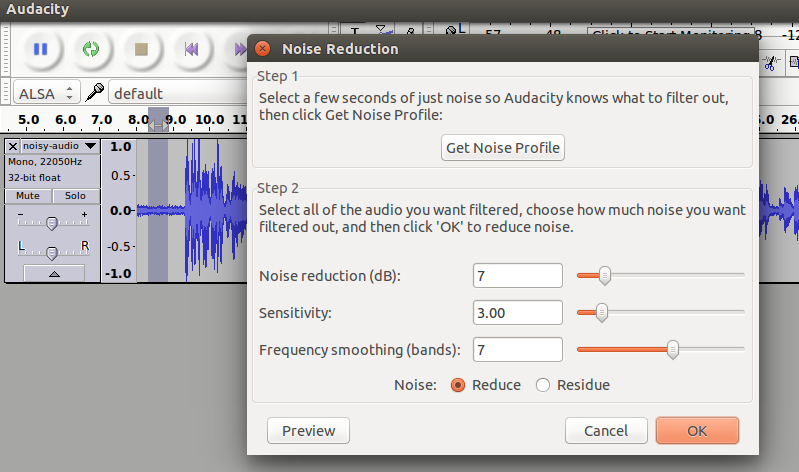
Get the noise profile
You may adjust Noise Reduction(dB) to control the noise reduction factor, where 0 being no reduction and 48 is the maximum on the scale.
Now, select the portion of video you want to reduce noise, or else you may do a cntl+a to select the entire audio strip for noise reduction.
Applying noise reduction on entire audio strip
The noise reduction is complete. You may select File -> Export Audio to save the modifications in your desired format.
Enhancing the audio quality
There are several effects under Menu -> Effect to enhance our audio.
For vocals, I usually prefer the following.
- Menu -> Effect -> Normalize and select Ok with default settings, this will bring the audio amplification to an optmized level.
- Menu -> Effect -> Bass & Treble and preview your settings for your optimum voice.
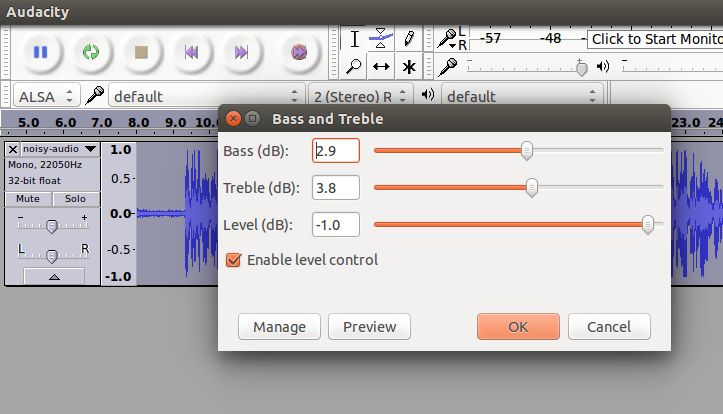
Adjusting Bass/Treble
- Menu -> Effect -> Leveler will normalize the audio. It will try to make an average peak level.
- There are many filters which can be applied on audio to make it more appealing or dramatic. The Change Pitch & Reverb may also be useful for vocals.
Blender as video editor
Blender is the free and open source 3D creation suite. It supports the entirety of the 3D pipeline—modeling, rigging, animation, simulation, rendering, compositing and motion tracking, even video editing and game creation.
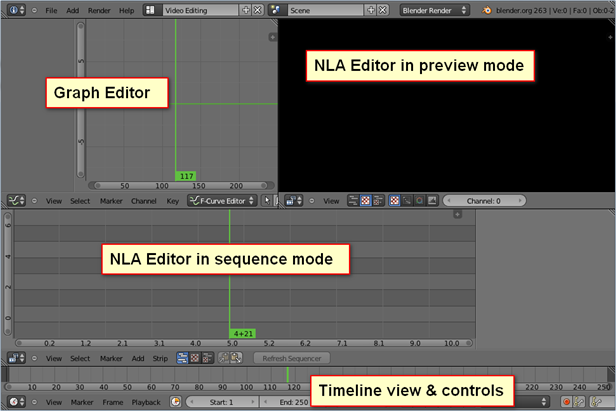
Default video editing screen layout source
Basic operations on VSE (video sequence editor)
Adding a media
Press shift a to add a media file to Sequence editor
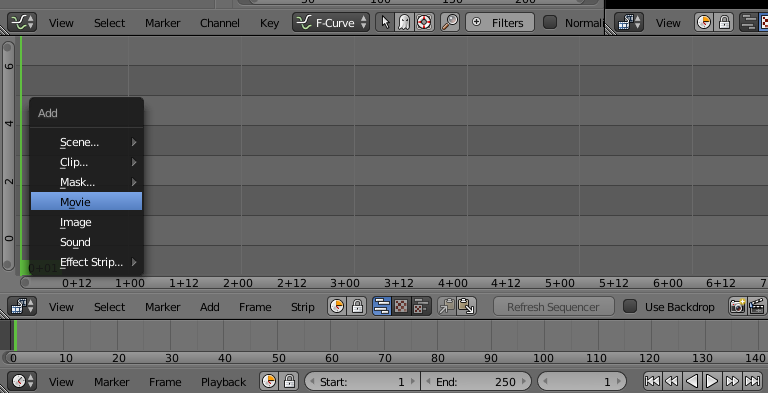
Adding a media file to blender’s NLA VSE
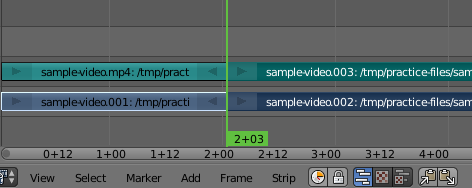
Once added blender will demux and show audio and video strips separately. We may select each strip Right click or RMB and press n by keeping the cursor inside the VSE to access the properties and minor adjustments.
The Left click on the strip will bring the green color cursor to the position we want.
Playing a strip
With curson on VSE press alt a to toggle play and pause.
Cutting a strip (Trimming)
Right click and select the strip and then left click to bring the cursor the cut location. Enter k to cut at the location.
Trimming a strip
Deleting a strip
Select the strip and press x to delete
Moving the strips
Select one or more strips by holding shift key and RMB. Select g to group them together and move the cursor to rearrange the strip.
Adding a transform Effect strip
Select the video strip and press shift a inside VSE to select Transfor Effect strip. Tweak the various transformations allowed by this strip by accessing the properties window on right hand side.
Adding a text Effect strip
Press shift a by keeping the cursor inside VSE and select text Effect strip.
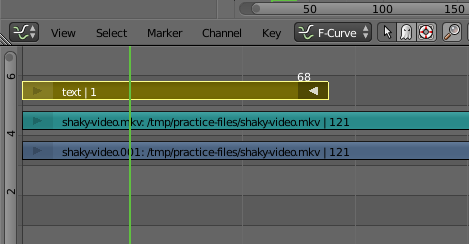
Adding a text overlay on video
Exporting video
Change one of the window to Properties and modify your export settings.
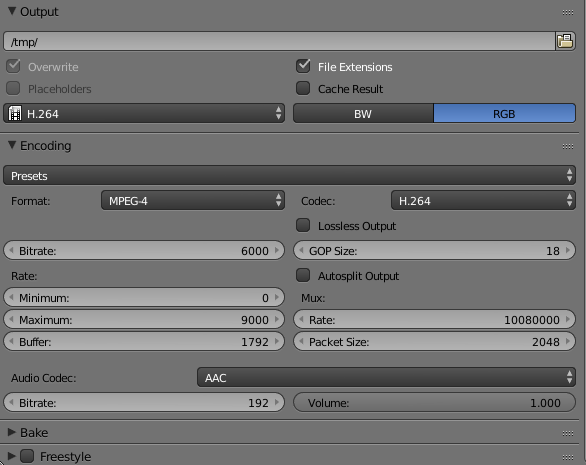
Exporting to mp4